I have been totally inspired by all the shutter projects out there and fell in love with the look of barnwood shutters. Specifically the ones found here. I have looked everywhere and could not find any…so I decided to make my own version. Now, this DIY Barnwood Shutters project would have been a breeze if I would have had some real tools…but I made it work. (Keep in mind I am NOT a builder…so I am sure there is a better way to go about this…lol)

I went to Home Depot and got some standard (1×3) pine boards. I had them cut them 36″ long. I then got some (1×2) boards that were just at the end of the isle and I took the home and cut them myself. I can’t remember how many of those I bought. I think they were 8 feet long so I bought 2, but not sure. Anyways, I bought miter box and saw to help with my cuts. Now…this is the first time I have used a miter box, and maybe I am just a wimp…but it was so hard. I knew better than to ask my husband….he would have just mocked the idea and said we don’t need barn shutters in our house! 🙂 So I tackled this all on my own. Anyways, this project was kind of just me using trial and error. I cut the boards and then cut cardboard to use as spacers.(I have my measurements diagrammed at the bottom of this post)
I set out my angled piece and put that in place so I knew where I would want my top cross pieces. I clamped these and used liquid nails to set them in place.
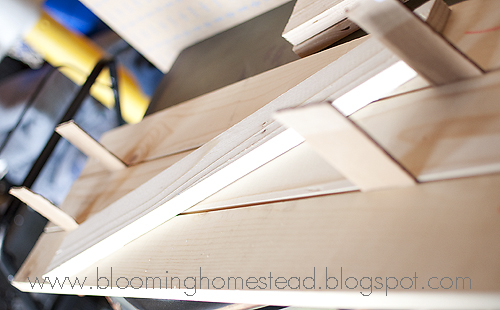

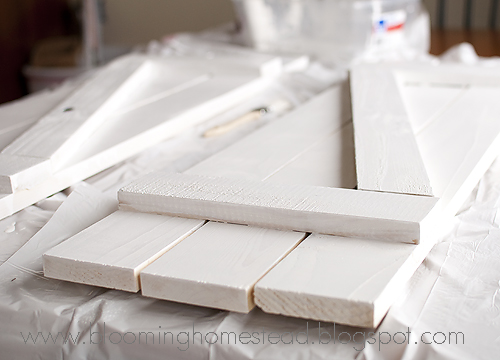
After I got them all set in place I used a few finishing nails by hand to secure the pieces. Then I sanded it down a little but wanted to leave these kind of raw. I wanted these to look natural and like old barn shutters uneven and all. I used white paint that I watered down a little so that after I painted them the wood grain would still be visible. Kind of white washed.
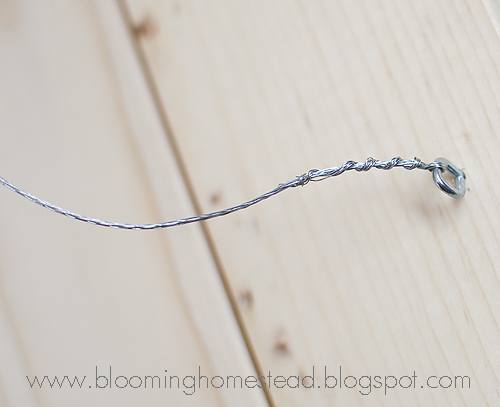
For easy hanging, I attached picture hanging wire to the back of each shutter.
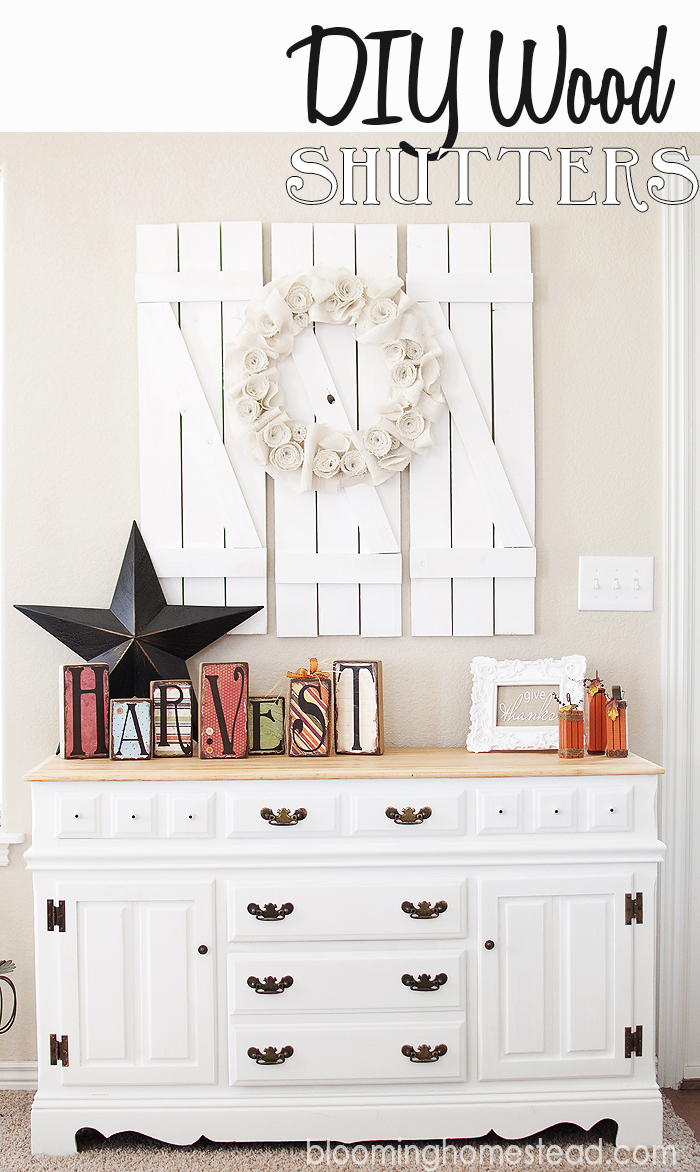
And here are my shutters. I’m pretty happy with how they turned out especially since I am such an amateur!
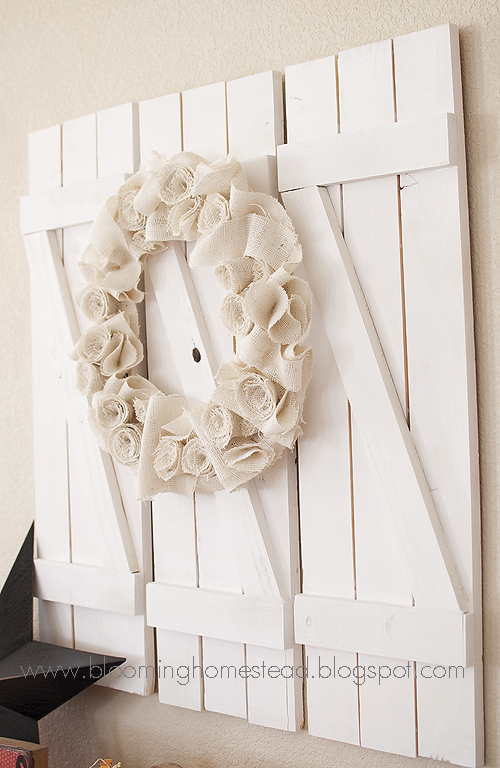
And my current holiday decor.

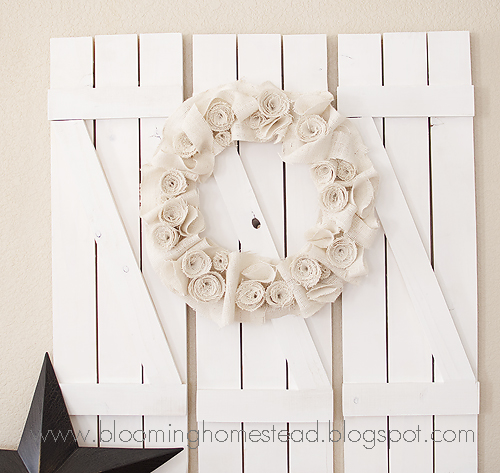

And there you have it, gorgeous DIY Barnwood Shutters!


These look sooo pretty! Love them!!
Coley @
whatyoumakeit-coley.blogspot.com
They look stunning!! Great job!
Thanks for linking to a Round Tuit!
Hope you have a great week!
Jill @ Creating my way to Success
http://www.jembellish.blogspot.com/
What a great look!! Looks like you’re turning into a builder. Great job.
This is gorgeous!! I’m a new follower!
You did such a great job on this. And wonderful styling, too! I’ve been thinking of making some shutters for the outside of my house for a while now. (But since I don’t own any power tools I have been putting it off…)
I love this look! I am starting to work on a gallery wall for my family room and this would be a great background for hanging pictures! Great tutorial!
These came out great! You’ve got me thinking I could make something similar with pallet wood. Nice job!
Cute! I made some just like these from the same inspiration!
http://sassysanctuary.blogspot.com/2011/09/barn-door-shutters.html
I love your whole display, especially your harvest blocks!
This is perfect! Beautiful job! Don’t tell my husband this is possible since I just bought some shutters at an antique sale last weekend… hehe! I’m a new follower, love your ideas and would love to have you stop by my new blog Burlapandbuttons.blogspot.com…
I love them! Thanks for sharing! New Follower! Visit me at http://raisingdieter.blogspot.com/ for a giveaway
I love this project. great tutorial. new follower here xxx
so pretty! i’m your newest follower =) would love you to follow my blog too… if ya like! l – summitstreetjoy.com
Great work!!!! They look awesome!
How gorgeous are these?! Great idea!!! 🙂
http://www.iheartmygluegun.com
This looks so pretty! I love your whole set up, the wreath, the letters and everything!!
This is such a lovely mantle, everything looks wonderful!
The shutters are awesome! Love the whole vignette.
Love LOve LOVE!!
Love them! Love your blog too. I’m a new follower. Here from tt&j.
You did a great job! I love your whole vignette. Thanks for sharing.Visiting through Weekend Wrap up
You did such a great job! I love how they turned out. All your other decorations are really fun too.
justenoughstyle@gmail.com
Looks beautiful! I love your wreath too! Thanks so much for linking up to The Creative Spark. I’ll be featuring this tomorrow! Enjoy the rest of your weekend and I hope to see you again on Tuesday night.
Jenn 😉
love this! and your sweet wreath!
This is the coolest idea! You did a wonderful job, I must make these! Just wanted to let you know that I featured this today!
http://southernlovely.blogspot.com/2011/11/show-share-14-features.html
They look beautiful! Thanks for linking up with us and hope you join us again this Wednesday! Have a happy Thanksgiving!
Marie
mylilpinkpocket.blogspot.com
Thank you so much for linking up to Show and Share last week. Make sure to come back this week with your latest project. I just wanted to stop by and let you know that I featured your DIY barnwood shutters come on over to see what I had to say and grab a featured button from my sidebar. Thank you.
http://tyandwhitneyulrich.blogspot.com/2011/11/show-and-share-15-and-features.html
A mommy’s life…with a touch of YELLOW
tyandwhitneyulrich.blogspot.com
You’ve been featured at Hookin Up with HoH!
Feel free to stop by and grab a button if you’d like.
Allison @ House of Hepworths!
Love it! What a great project!!
Shannon
http://www.akadesign.ca
This entire display is just lovely! Thanks so much for linking up to my Saturday Seven Party last week. I’ll be featuring your project in tonight’s lineup!
This is an interesting idea.
What like is the Harvest Blocks. When your thinking of ideas perhaps a tutorial for the Harvest Blocks would be interesting.
Then I could use something similiar for Christmas
Mireille
Thank you for all the tutorials you are offering. There are are number of tutorials that is definitely on my list for trying.
I love the creativity that you offer.
It is so inspiring. And I also love reading the comments. There are no boring people here. Everyone I can learn from
M
Mireille
Thanks everyone! I love your sweet comments.
Mireille, I will definitely try and do a tutorial like my harvest blocks soon. 🙂
Marie
this is so gorgeous! Amazing job!! I am going to be featuring you at my party tonight:)
Love these!! Just pinned them to my pinterest boards.
Jamie
http://diyhshp.blogspot.com/
I came across your blog while blog hopping. Love these shutters! I am pinning this on Pinterest. Actually I’ve been all around your blog and pinning recipes, printables and more. Thanks for everything, love your blog! : )
Found your blog on pinterest. LOVE these shutters. Would love to make the wreath as well shown here in your post.
Those are really gorgeous and elegant looking exterior wood shutters. Thanks for sharing this post. What kind of wood did you use? Seems soft look at. I like them is it expensive?
Thank you Anne, they were very inexpensive. I just used the cheapest scrap wood I found at the end of the isle at home depot. Super affordable!
Adorable!! Greatjob!!!
Thank you!
Those are really gorgeous and elegant looking exterior wood shutters. Thanks for sharing this post. What kind of wood did you use? Seems soft look at. I like them is it expensive?
Love these! Awesome dresser makeover too.
Thank you so much Elizabeth!
These shutters look great. I thought the ornament in the middle was a nice touch as well. These seems like something that I could try. Thanks for sharing.
I love these shutters! How did you hold the 3 long pieces together? Maybe I missed that part? Love, love!
Hi April, I just used the cross board as the brace with the bottom and top board. They hold the 3 boards in place.
Love them! At what angle did you cut that cross board that attaches to the two 11″ boards?
To be honest, I don’t remember exactly. I didn’t use an angle when I made these years ago, I actually just laid it out and sketched where I wanted my cuts to make them fit. Sorry!
Hello, my wife gave me this link to build these for her and I see some possible errors in your listed material. Are you sure you didn’t use 1×4’s for the 36″ pieces and 1×3’s for the cross hatching? I ask because you show the width as 11″ and if it was 1×3’s (which actually measure 2.5″) then it would be 3 times 2.5″ wide which is 7.5″ plus possibly another half inch for spacing so a total width of 8″. But if those were 1×4’s (which measure 3.5″) then it would be 3 time s 3.5″ wide which is 10.5″ plus the .5″ for spacing which equals your 11″. I don’t want to be rude, but I thought it might help other husbands out there 🙂
Thank you! You are correct and I will make those changes. 🙂 Lucky women to have you make these for her!
Nice Shutters.