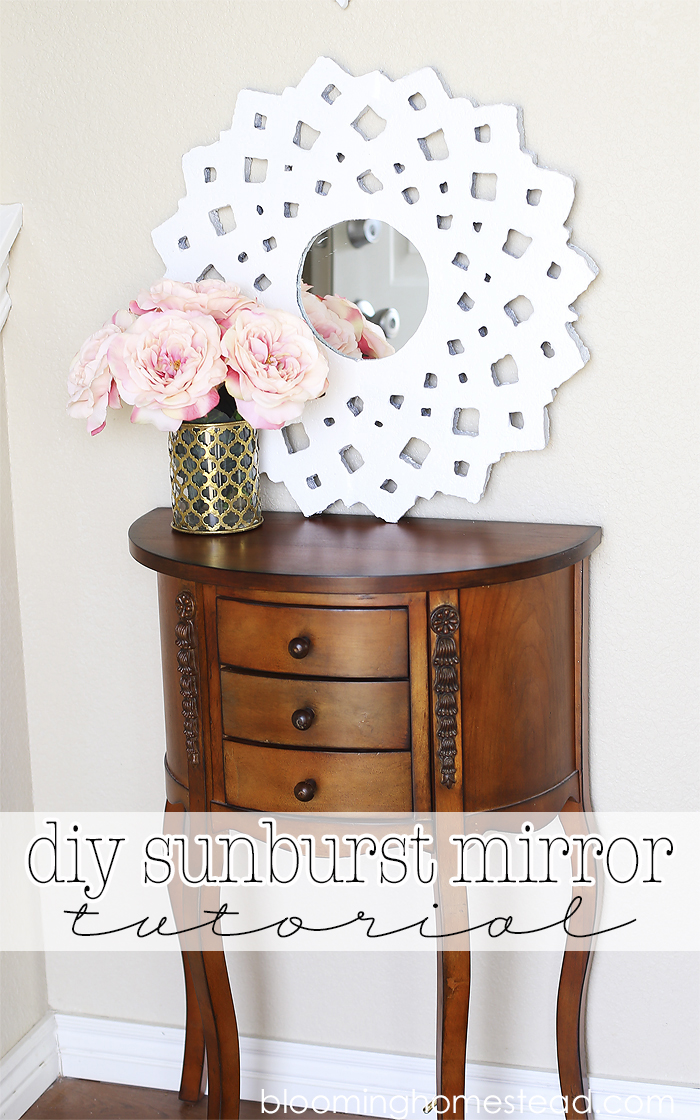
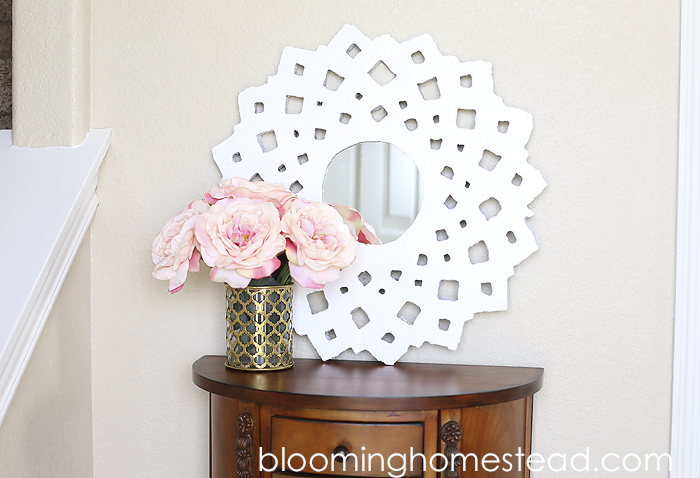
Hello friends! I’ve got another cute diy project to share with you today. This DIY Sunburst Mirror was fun to make and you won’t believe how it all came together! I received a StyroCutter® Plus and some Make It: Fun® Foam Sheets from FloraCraft® to play around with and as you can tell I was pretty excited about the finished product. (We all know I have a thing for mirrors!) Check out the tutorial below.
Supplies:
- 1″ thick foam sheets
- StyroCutter® Plus
- Pattern/stencil for mirror (I purchased the design and cut it with my silhouette)
- marker for tracing foam
- Smoothing coat (I used Magikote)
- foam roller
- 6″ mirror
- sandpaper
- Finishing paint
- Xacto knife
- Hot glue
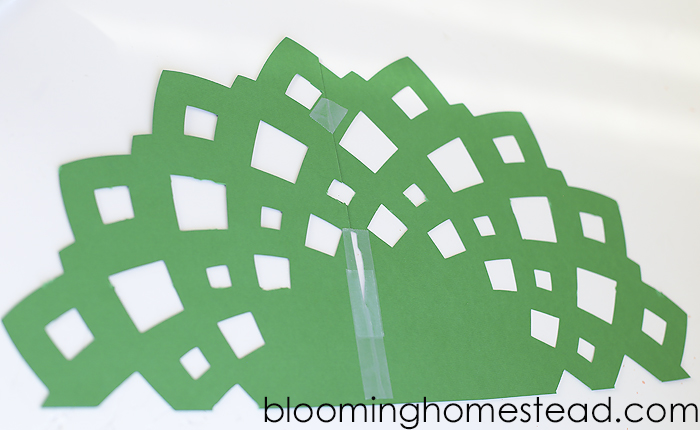
To start, you’ll want to design your sunburst pattern. I purchased a design from the silhouette online store and cut it out with my silhouette. If you don’t have a craft cutter I recommend freehanding your own design on cardstock until you get a pattern you like then cut it out with an Xacto knife. When my pattern was cut with the cardstock I placed it on the sheet of foam and traced it on with marker. Because of the size I wanted my mirror, I needed to use 2 foam sheets. I traced 1/2 of the pattern on each sheet which I eventually glued together to make my full circular mirror.

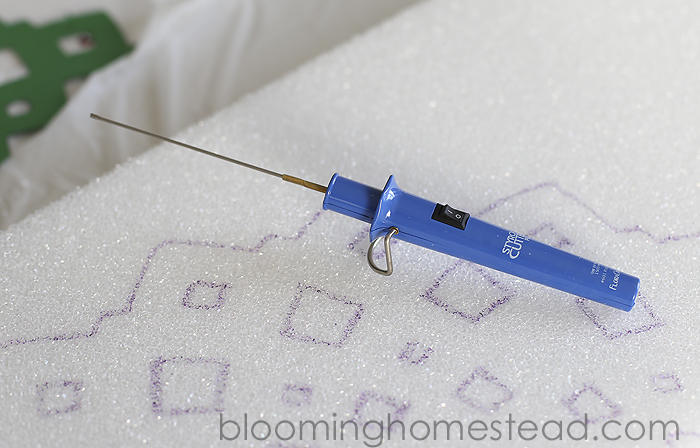
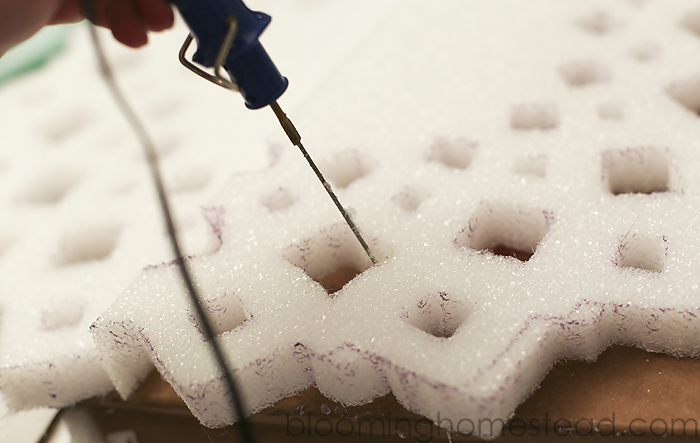
When you have your pattern traced on it is time to cut it out. I must say I was fairly impressed with how easy the StyroCutter® Plus was to use. It worked through the styrofoam nicely and was easy to maneuver. I created a video sharing some tips and trick and my thoughts on the styrocutter that hopefully you’ll find helpful.
Because of how hot it got I decided to wait and use it after my little girl was in bed…I always get nervous using hot tools when she is toddling around my feet. (Just in case!) So don’t mind the horrible night lighting in the video. 🙂
After my design was all cut came the tedious part. When working with foam you can paint it with a water based paint but you’ll still have a “foam” texture so I used some smoothing paint/putty to help reduce the foam texture as well as give it a good primed base for me to spray paint the final coat. (You do not want to use spray paint on foam that hasn’t been treated unless it is water based otherwise it will eat up your foam!)
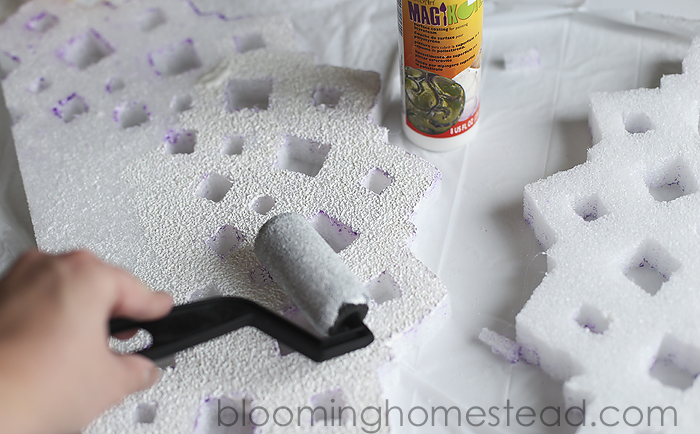
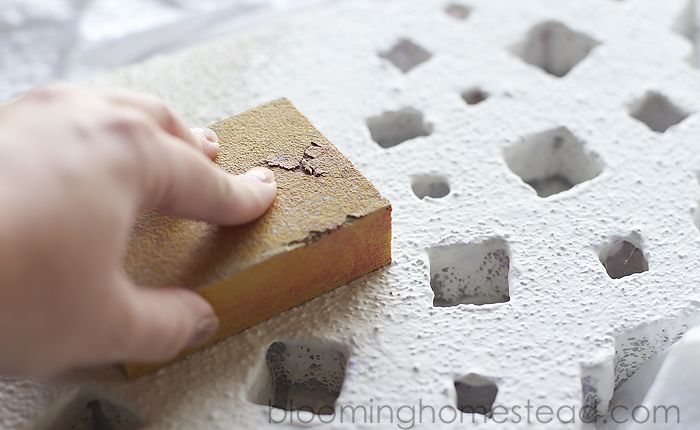
This process took me like 6 coats to get it the texture I wanted. Plus I had to use a small paintbrush to coat the inside of each square (I wasn’t super exact with it because it isn’t very noticable). It was a long process but after it was sanded down to smooth it, it looks great. One thing to note is some of my squares became less uniform because of the amount of putty that settled in them so if you want to be more precise go over each square with a small paintbrush while each coat is wet to smooth it down. Before I painted the final product I flipped over the foam and traced where I would be placing my mirror.
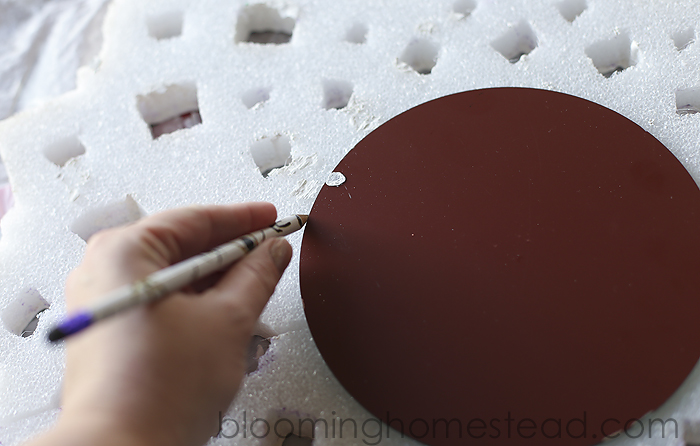
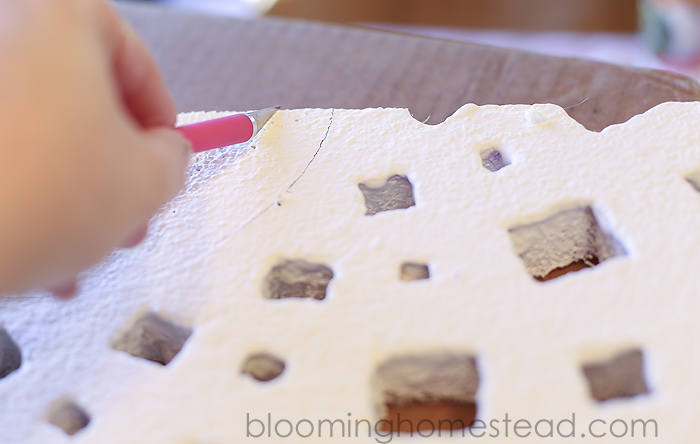
I decided that I wanted to leave a 1/4″ lip around the mirror to help hold it in place and provide a more seamless look so I used an Xacto knife to cut down into the foam 3/4″ deep. (I still have not attached the two pieces at this point. It was easier to cut through doing each side separately.)
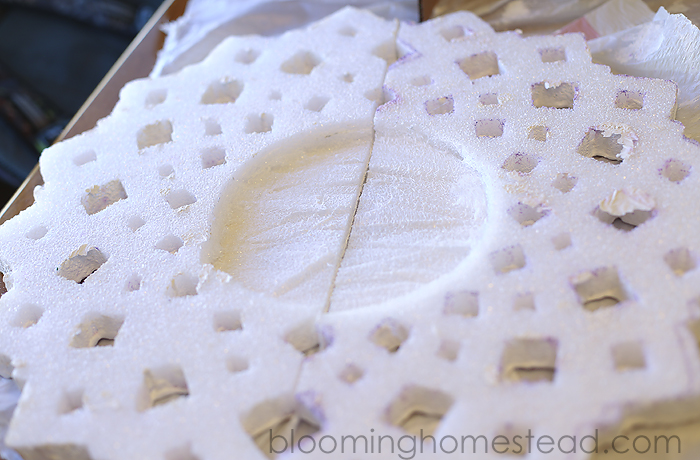
Now you’ll cut out your inner circle so the mirror will be visable leaving the 1/4″ ledge for your mirror to sit
When you have your inner area cut out, you’ll want to coat it with the putty to match the texture. At this point I used a dab of hot glue along the inner edges to secure them together. There may be a better way as hot glue can melt foam, but it seemed to work okay and was sturdy enough to hold so I went with it. Now you’ll just paint your foam, when it is dry hot glue the mirror into place. And that is it! A fabulous sunburst mirror that is lightweight, customizable, and affordable!
This was a pretty fun project to do and I think my styrocutter and I will be creating some more fun projects soon. Be sure to check out Make it: Fun Crafts for more fun craft ideas!
I link to these parties here.


This is amazing, Marie! You did a beautiful job. I love this mirror! Thank you! Sharon
Thanks so much Sharon!
Wow!! It really looks amazing! At first look I thought it was made out of wood! I bet it’s so light and easy to hang. Great job 🙂
Thanks so much. I love that it is so lightweight!
Cool idea, have never heard of a styro cutter before!! what a neat craft idea!
I hadn’t heard of it either but it was simple and fun to use. endless possibilities.
This is so pretty, and now I want to make my own! I’m stopping by from the Home Matters Party, and I’m pinning this! Enjoy your weekend!
This is a great idea Marie (it’s nice to find another Marie in the blogosphere – there is not very many of us). I pinned it for inspiration because I just might have to make one of these! So glad it caught my eye at the Creativity Unleashed party.
Thanks for stopping by Marie, you are right I don’t run into too many Marie’s! Thanks for stopping by. 🙂
This is a really cool idea! I have a silhouette and I could totally do something this cool. I had no idea they even made those boards. Thanks for sharing, I pinned it.
You should give it a try, it just needs some patience!
This is so cute! I love this project.Mirrors are so fun to decorate with. Thanks for sharing at the #HomeMattersParty – we hope to see you again next week. 🙂
~Lorelai
Life With Lorelai
Wow! That is super crafty. I don’t have the patience for this craft but I so admire your results. It turned out beautiful.
Thanks so much!
What a lot of work, but it came out so beautifully it was totally worth it. Having a nice light weight large mirror means all sorts of possibilities, what a clever idea.
It was a lot of work (more than I thought) but I love the result.
Gorgeous mirror! I love how simple it is but so stunning to look at. Thank you for sharing. PINNED!
Thanks so much Michelle.
This is SO beautiful! I just love how it turned out. It totally doesn’t look like styrofoam on the wall, and it looks expensive and heavy! 🙂 You had me fooled!
Thanks so much Amanda.
At first look I never would’ve guessed this was made out of styrofoam! It looks great!!
Good deal that you couldn’t tell! I worked hard to transform it. 🙂
I love this idea! I’m always looking for ways to add a little touch of class to our home on a budget. This is perfect! Pinning!
Thanks so much Leesha.
What a neat idea! I love how this turned out 🙂
Thanks so much Angela.
What a great idea- this is so pretty. I’d like to link to this on Friday, if that’s ok with you (I put text links to things I think are pretty every Friday).
I stopped by from Frugal Crafty Home.
Sure Jessy!
Thank you 🙂
This is so awesome and I never would have thought it was made of styrofoam! Thanks so much for sharing at The Makers, pinned 🙂
This is SO cool!!! Stopping by from Outside the Box 🙂
Wow, this looks amazing! I would never have guessed that it is made of foam. Great work!
Thanks so much Carmia!
It looks beautiful!
Thanks so much Stacy!
Wow I’m not sure mine would look as pretty if I attempted it but yours sure is beautiful!
Thanks so much Sarah!
This is gorgeous! I never would have guessed it was made from foam. Thanks for sharing at Best of the Weekend!
That styrofoam cutter had been on my Amazon wishlist for months! Your fabulous project just gave me the nudge to get it for my crafts! Thanks so much for linking up with Show Me Saturday. You are one of my DIY features this week!
You should for sure give it a go!
I love this project! What an awesome idea. It looks like an expensive item from a high end store. Great job!
Thanks so much Paula!
Hello beautiful! I’m stopping by to let you know that Jessica chose your sunburst mirror as her favorite. We will be featuring it at our party tonight at 7. Thank you for bringing such an amazing project to our party. Lou Lou Girls
Wow!! This is awesome.. Great tutorial
Thanks so much Marni!
How creative! And not to difficult to make either. I wanted to let you know that I’m featuring this post tonight at the Create & Share Link Party (7:00 PM MST)! Congratulations!!! Can’t wait to see what you share with us this week. 🙂
Thanks so much Mandee!
I’ve been looking for inspiration on an easy mirror for my entryway. This is just the inspiration I needed and the best part is that it is a DIY! I am a sucker for DIY! Dropping in from Your Whims Wednesday congrats on the feature! Pinning it!
Thanks so much Gina.
I was so happy to see this project on the party board! What a fantastic idea to make a sunburst mirror! I always have a tough time cutting the foam with those cutters, you did great. Love that the Silhouette made the pattern! Thanks so much for pinning to the P3 Party Board! You are being featured on my blog & social media tomorrow!
Kim
Thanks so much for stopping by Kim!
What an amazing idea- this is so pretty. White sunburst mirrors are the best in my opinion!