This post is sponsored by DecoArt. All thoughts and opinions are my own.
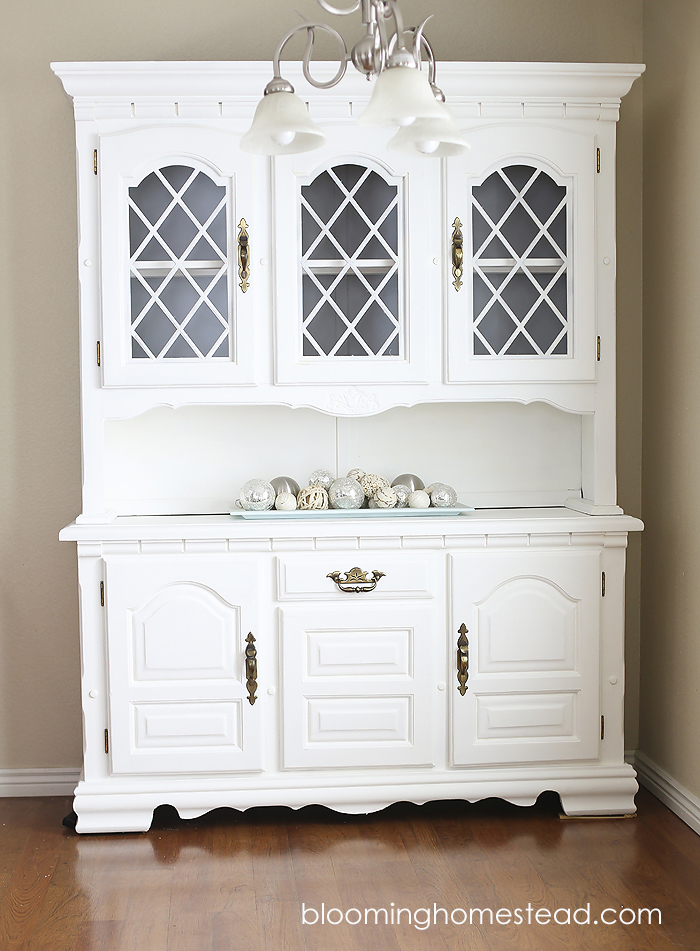
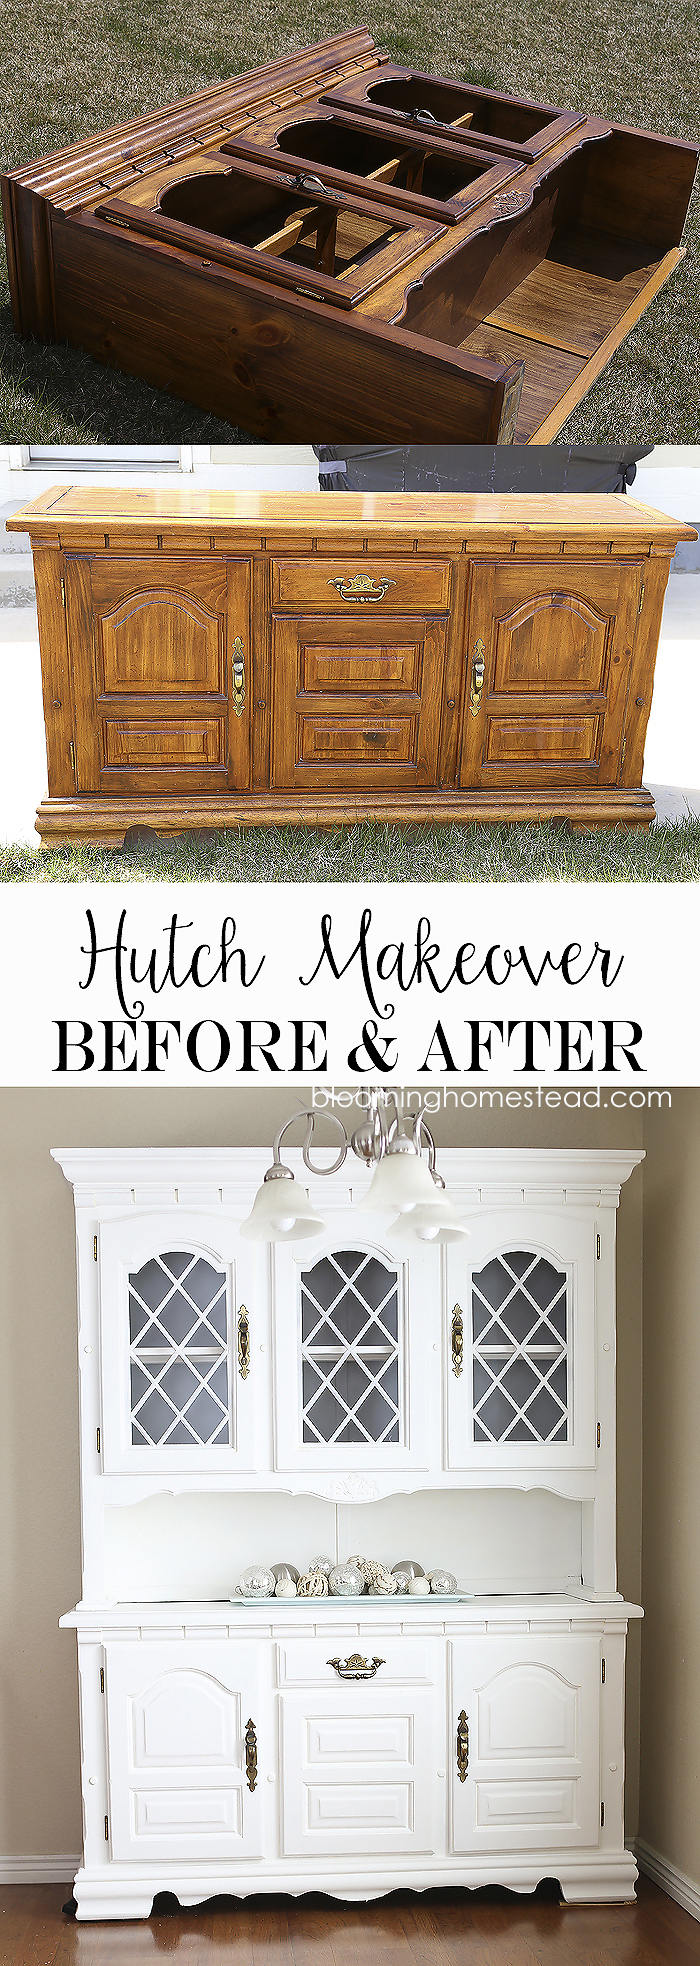
Hi friends, today I am so excited to share this project I have been working on for the past few weeks. I purchased this hutch a few years ago but wasn’t sure how I wanted to refinish it. After looking into a few options, I decided to go with the Americana Chalky Finish paint by DecoArt. I am thrilled with how this China Hutch Makeover turned out!
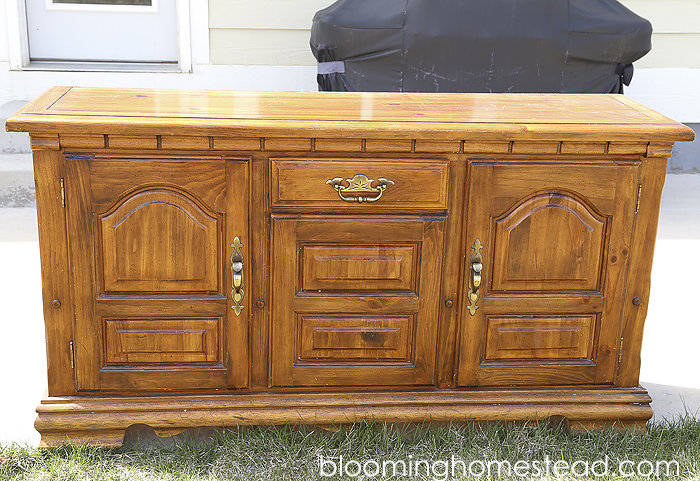
Here is how the buffet and hutch looked originally. The hutch had some damage so I didn’t get a pic of it all put together before I painted it. But this piece had the lovely speckled wood 80’s finish common to so many furniture pieces.

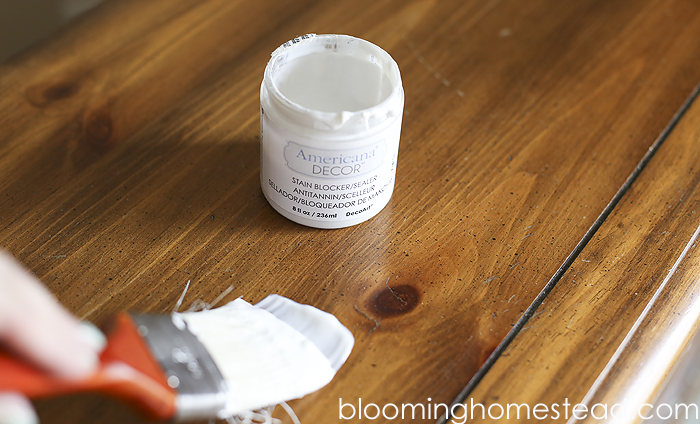
After removing all the doors and hardware, I got started. The beauty of chalky finish paint is you don’t have to sand which saved me a ton of work! Instead I went ahead and used the stainblocker as a base to prevent bleed through and staining through the paint. This took a little time because it has a recommended cure time of 5-7 days.
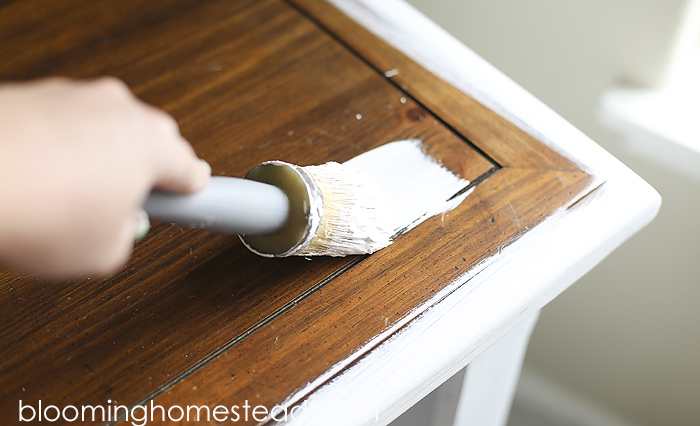
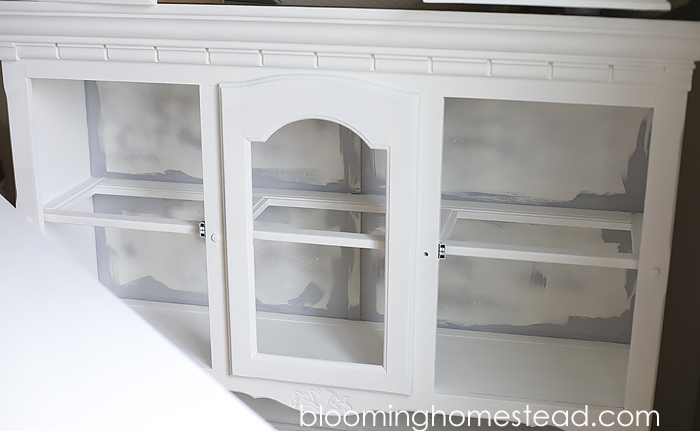
After my stainblocker was cured it was time to paint. I used 2-3 coats of chalky finish paint in Everlasting.
I decided to paint a contrasting color on the back in a blue/grey color called Yesteryear.
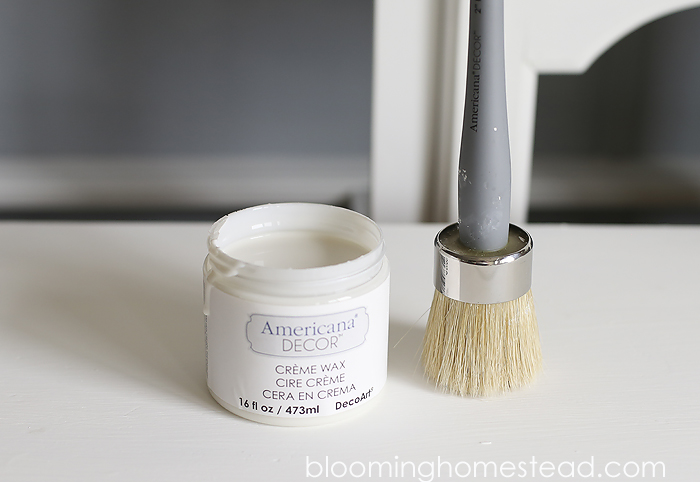
After paint I used the creme wax to seal the piece.
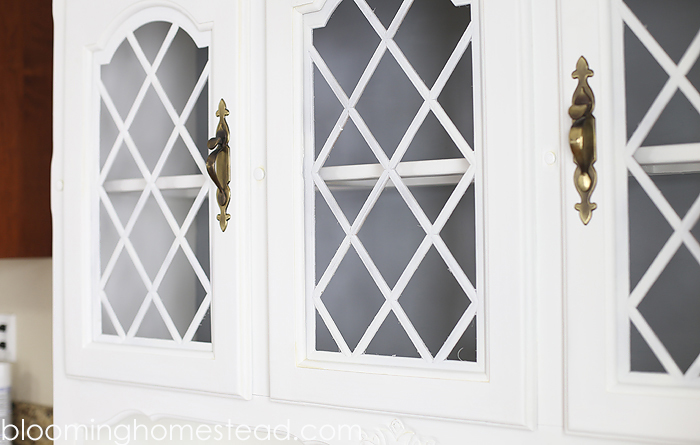
After it is all cured and buffed I installed the doors and hardware.
I am thrilled with how it turned out, the chalky finish made this huge job so much easier. What do you think of the finished product?
Be sure to visit the DecoArt Chalky Finish Website for more inspiration and information.
Check out some of my other makeovers:

I link to these parties here.


Such a difference I love it! Fantastic job!
Thank you so much Kim!
Beautiful!
Beautiful job! The hutch looks so much better!
Thanks so much Wanda, I totally agree!
This is beautiful, Marie! Such a lovely makeover. And Yesteryear is one of my faves! Sharing. xo
Thanks so much Katie!
Love it
Such a lovely piece. Wonderful transformation!
Thank you so much!
it looks beautiful! I need to try chalk paint. It looks so great!
I know right? Chalk paint is so fun and easy!
I sure do love your furniture makeovers! Now I just need to find some furniture to redo myself! Thanks for linking up to the Handmade Hangout!
Squeal!!! Love this makeover so much. I have just the place for it too ( wink) Thank you for sharing at the Thursday Favorite Things blog hop. xo
Marie – I love your cabinet remake! Thanks for sharing at the Thursday Favorite Things Blog Hop. I will be featuring you on my Tuesday Treasures tonight! I invite you to stop by and take a look!
Marie,
What a great makeover… Featuring you on Friday!
THANK YOU SO MUCH for visiting our party!
xoxo
Beautiful! I love the color and look of your hutch. I’ve been wanting to paint several of my old pieces. How much paint did the hutch require (how many jars/ounces)?
Hi Carolyn, I took a lot more than I originally thought because I did about 3 coats to make sure I had complete coverage and I sanded a bit here and there where it needed it. I am thinking (including the yesteryear gray color) I used about 56 oz total. But like I said, I forgot to keep track after a while. 🙂
hello!
Love the finished product!! I noticed the doors a different, usually where glass would go. What was done here? I’m thinking of doing something similar. You feedback would be wonderful!!
Hi Monique, I painted the inside of the hutch a grey color and then I removed the glass for the photos to avoid glare, but otherwise I left them the same. The lattice piece I painted white and it can be removed. Hope that helps!
I love It! I recently did my own DIY hutch makeover as well! Check it out and let me know what you think! http://imperfectlychic.com/?p=312
I love how your hutch turned out. Doesn’t the white make such a difference?